Different Navigation Modes
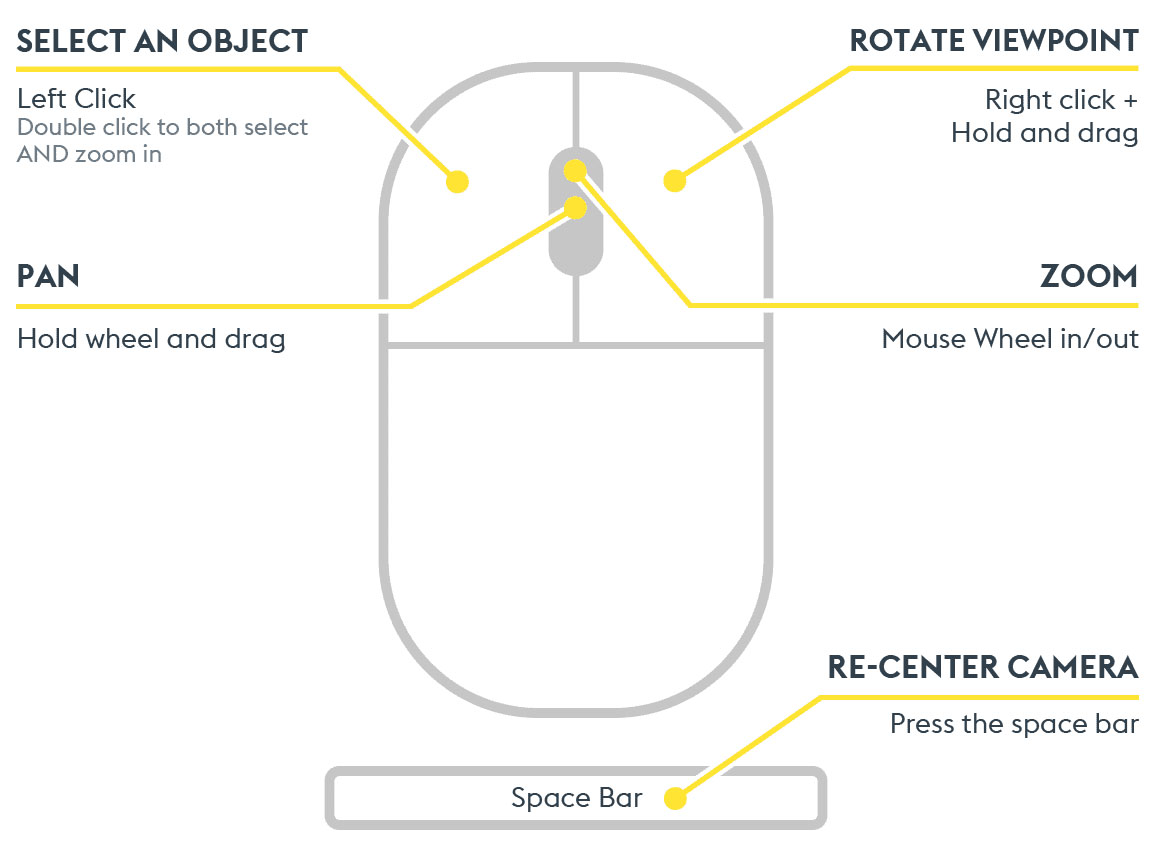
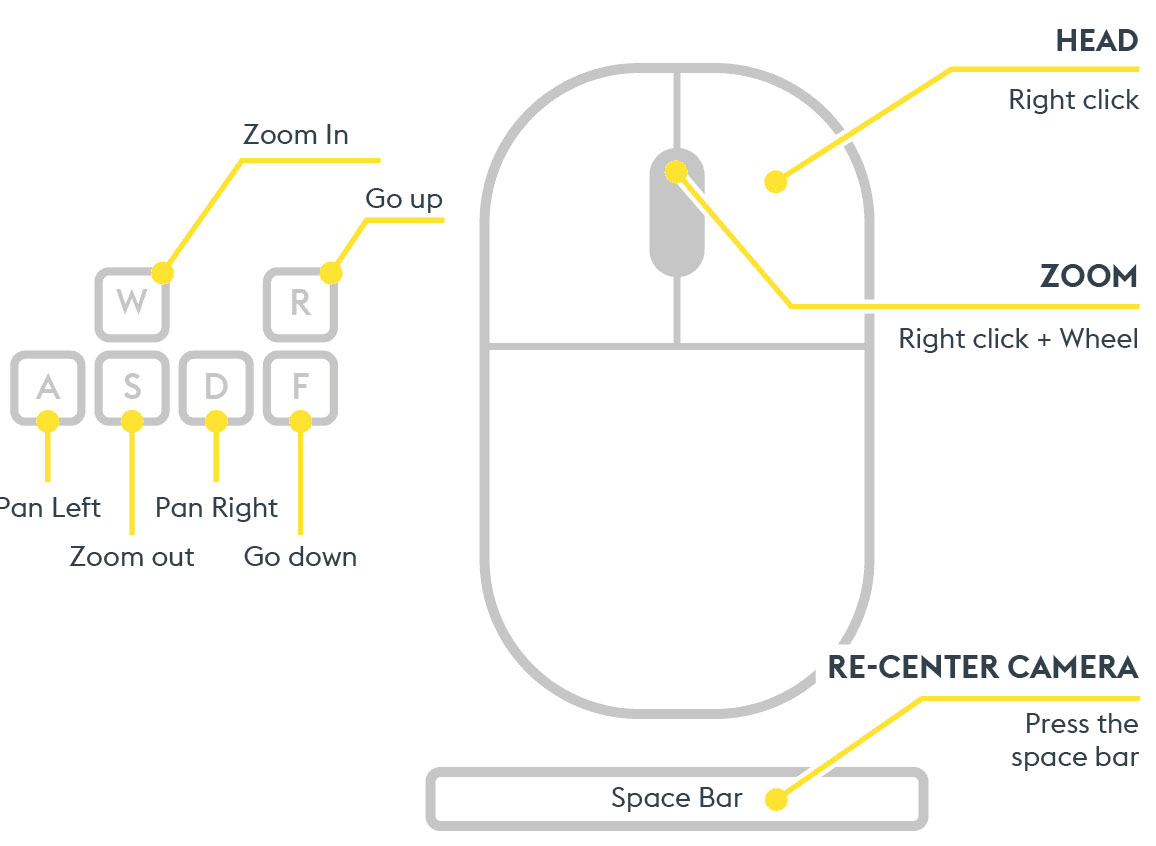
There are three navigation modes: Orbital, Examine Mode, and Fly Mode. By default, the orbital mode is selected. It is the most intuitive for basic use. For more information on the modes, we suggest you watch the discovery tour, available at the software’s opening and in the Help menu, which describes the functions of the keys for each mode.
Press the Start button to begin.
Moving in 3D
The Central Navigation Point
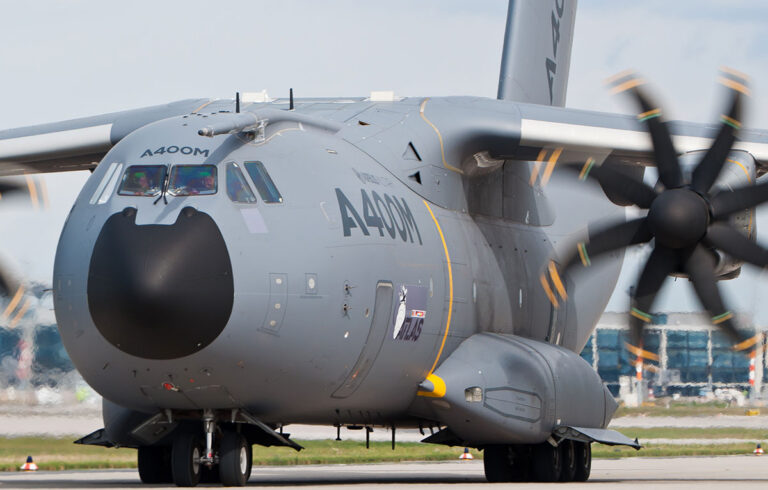
In orbital mode, you can select a central navigation point either by clicking the mouse wheel or by right-clicking/set navigation center. This will set the point around which your camera will move. Scrolling the wheel forward will zoom in on this point, and scrolling backward will move away from the point. Selecting a part with a simple left-click places the central navigation point on that part.
Orientation
Orientation is done by holding the right-click, then moving the mouse.
Translation
Translation (pan) is done by holding the mouse wheel and moving the mouse.
The Cube
The cube allows for strict orientation of the camera. Simply click on a face, a corner, or an edge to automatically orient the scene.
A single press on the mouse wheel places the centre point of navigation at the desired location.
Approaching
Tips
Zoom: Mouse wheel forward/backward
Smooth Zoom: Hold the wheel + Ctrl + move the mouse forward
For a quick approach, you can use the space bar, which will center the view on this point. This is also the function of the “fit to selection” button.
Double click a part for a quick approach to it.
Conversely, the “See all visible geometries” button allows you to replace the model at the center of the scene, moving away from the part.
The “Activate zoom mode by marquee” button allows you to select an area and approach it. When this is activated, simply select an area with the left mouse click, hold, and expand or reduce the selection area. It automatically deselects after use.
Orthographic projection is a representation without perspective, with real dimensions for technical drawing.
Perspective projection creates an illusion of depth, used for realistic renderings.
Visualizing
To better visualize a hidden part, you can use the “isolate mode” button. This allows you to ghost the parts that are not selected, in order to visually isolate your selected part.
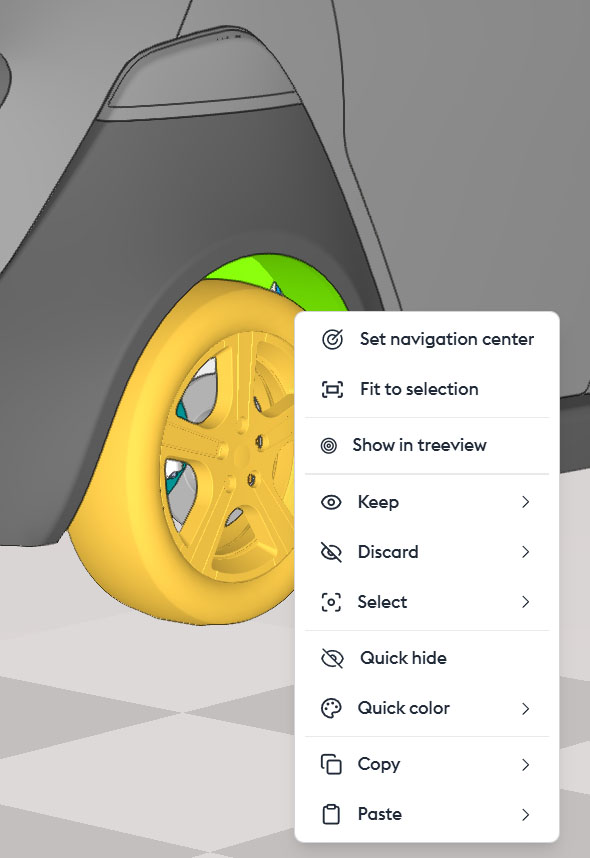
The Contextual Menu of the Parts
A right-click on a part opens a contextual menu, from which several actions are possible:
- Set to navigation center: Allows you to set the central point of navigation.
- Fit to selection: Allows you to get closer to the part.
- Show in treeview: Allows you to select the part in the treeview.
Keep/…: Allows you to create a filter that will be added to an existing layer or a new layer. Please note that only metadata checked in the favorite fields of the ID Card (of any part) can be used to create a layer. If the layer creation option does not appear, it is most likely due to the absence of selected metadata.
- Discard/…: Allows you to create a layer with the chosen name and force its state to “invisible.” Useful for hiding a part or a set.
- Select/…: Allows you to create a layer with the chosen name and force its state to “inactive.” Useful for coloring, for example.
Quick Actions
“Quick Hide” or Delete allows you to instantly hide a part. You can undo this action right away. You can also inspect all hidden parts in the “Hidden Geometry Space“, and make them reappear by performing the inverse operation — that is, showing the geometry.
“Quick Coloration“
allows you to quickly apply color to a part on the fly. The “Quick Coloration” button removes the temporary coloring and restores the original color. It’s not possible to choose which parts are affected: all parts will revert to their original color.
For this reason, using quick coloration is not recommended for long-term projects. Instead, you should use layers.
However, it’s possible to restore the original color of a single part by right-clicking → Quick Coloration → Reset Color.
Warning: These actions will not be replayed if the build changes or if you share your model. They are for temporary or illustrative use only. They will be saved in your view, but won’t be reapplied if the model evolves or is sent to someone else.
- Copy: Allows you to copy a context.
- Paste: Allows you to paste a context, into another application, for example.
Miscellaneous (bottom right menu)
The “Configurations” button allows you to quickly switch from one version to another of your model. If it was created with multiple configurations, you can display them here to compare or work on another version.
The “Quick Hide” button offers the possibility to switch to the “hidden world,” the display space for parts that have been hidden on the fly. You can choose to make some or all of them appear in the “visible world.”
The “Quick Coloration” button allows you to remove on-the-fly colorization, returning to the original color. It is not possible to choose which parts will be affected: all parts will return to their original color. This is why it is not recommended to use quick coloring for long-term projects. You should use layers instead. However, it is possible to return to the original color of a single part by right-clicking/quick coloration/reset color.